By Someone Who Didn’t Know What They Were Doing When They Started
Welcome to my website! I built this website using Hugo and I host it on GitHub Pages.
I started this process with a URL and no clue what I was doing. This guide is for anyone who wants to create a simple website to showcase work but doesn’t know where to begin.
I hope that someone else with no technical experience can follow these steps to build their website and skip all the frustrating hours I spent figuring this out on my own.
I did all of this on a Mac. If you are using a different operating system, your exact steps may vary.
Building Your Site
1. Open Terminal
Search for Terminal:

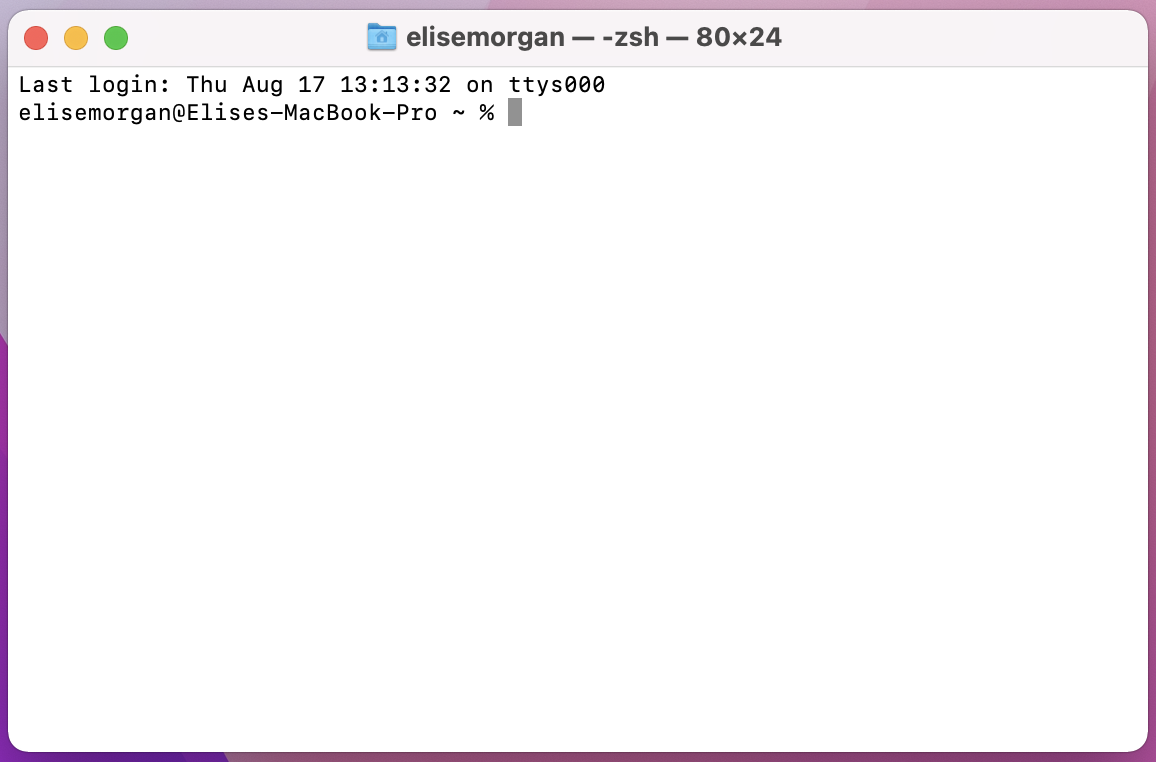
Terminal Window:
2. Install Hugo
Follow Hugo installation instructions.
3. Install Git
1. Check that Git is installed on your computer:
git --version
If Git is installed, you will see a message displaying your current version:

2. If Git is not installed, an installation may automatically start.
If not, follow the Git installation instructions.
3. Choose Your Theme
1. Choose the look of your site from Hugo’s catalogue of themes.
I used PaperMod on this site.
2. Click Download to go to your theme’s GitHub page.
Keep this GitHub page open for later.
4. Build Your Local Repository
>>This is a Terminal command<<
[]insidecommandsnippets show where you will insert your unique value. Paste these lines into your terminal, but eliminate the[]after inserting your unique value.
1. Build hugo site:
hugo new site [name of directory]
Use something short for your directory name. I used portfolio.
2. Navigate to new site directory:
cd [name of folder]
Moving forward, you must be in your directory to do anything. If you see:
That means you are not in your site’s directory folder. Use the
cdcommand to navigate to your directory.
5. Add Your Theme
1. Initialize Git:
git init
2. Use Git to import your chosen theme into your site’s repository:
git submodule add [the directory for your theme]
Find the directory for your theme in the theme’s GitHub ReadMe file. There will be a themes/[theme name] after the url. Don’t leave that out!
3. Add the theme to your site’s configuration file:
echo "theme = '[theme name]'" >> hugo.toml
4. Each theme is unique and may require alternative or additional steps.
6. Launch Hugo
1. In the Terminal, enter the command:
hugo server
Troubleshooting: If Hugo says it cannot launch, be sure you navigated into your site directory with
cd [directory name]before launching Hugo.
Hugo is now building your site on your local server. Run http://localhost:1313/ on your browser to see your site.
You can continue to create and edit your site files, and preview your updated site on your local server. Hugo updates saved changes in real time.
7. Download Visual Studio Code
This is the interface that I use to navigate my site directory and create content.
8. Set Up Your Site
This is where I struggled as someone who had no understanding of how these sites work. My breakthrough moment came when I realized that my theme included an example site with all its own files. This meant, I could mimic the example site files to successfully build my own. I recommend you do the same! Depending on the theme you use, the following instructions may not be exactly correct. Look at your theme’s example site (the url to view the example site will be on its GitHub page) and mess around to find the best way to build your site content.
1. Open site directory in Visual Studio Code:
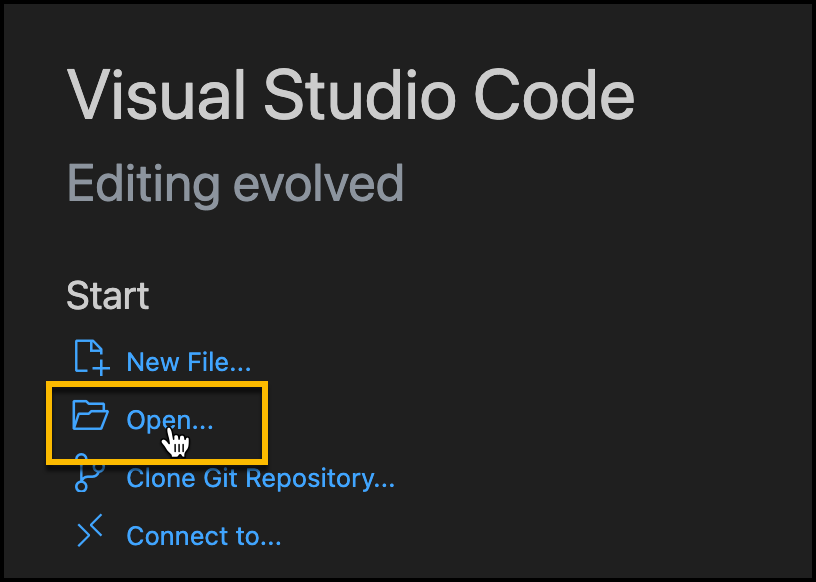
You can now see and you entire site directory in Visual Studio Code:
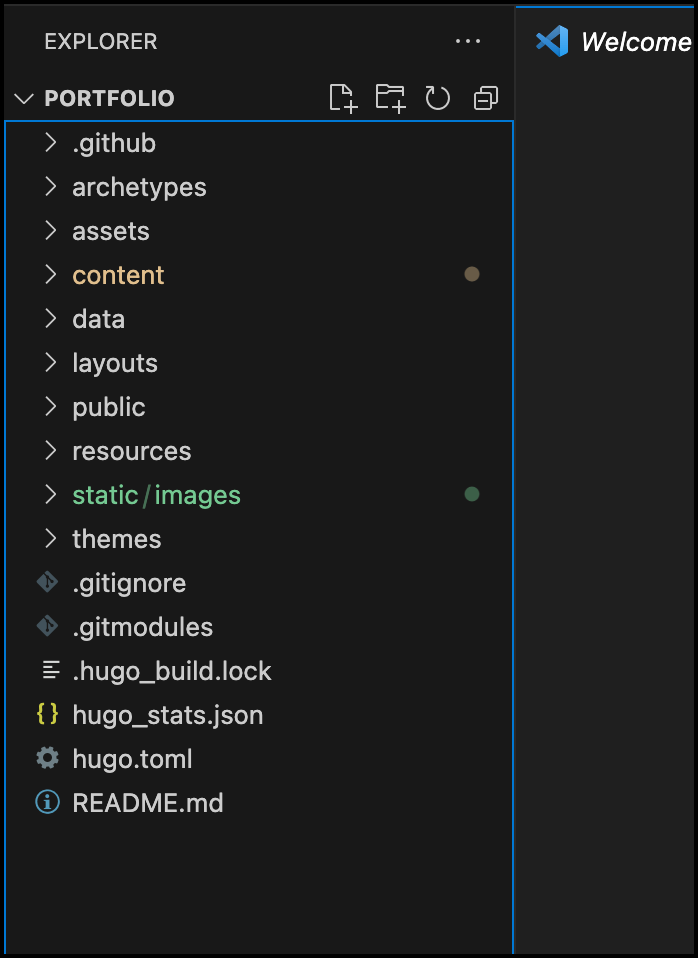
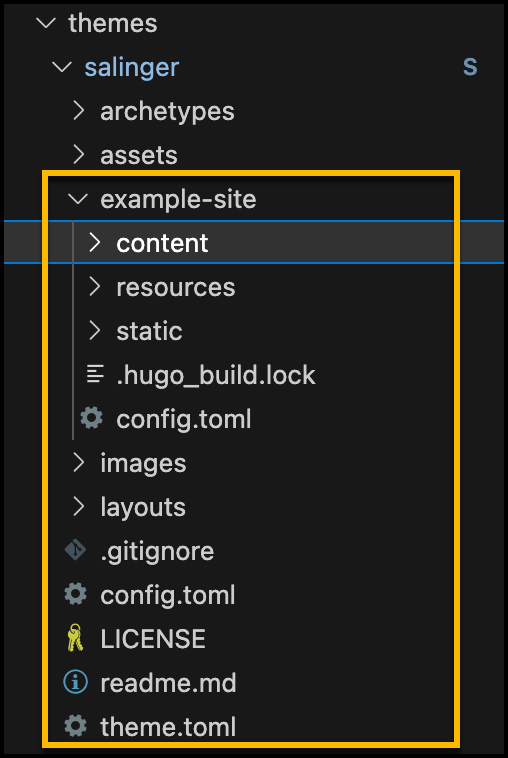
2. Look through the example site files included in your theme Portfolio > themes > [theme name] > example-site:
3. Set Up Your Config File:
hugo.toml was created when you set up the Hugo site. This file defines basics, like language. It is where you create site headers and navigation menus.
Add additional elements to your hugo.toml, such as headers, by following your example site’s .toml file.
9. Create Homepage Content
In Visual Studio Code:
Follow your theme’s example site to determine how to setup your homepage content.
Depending on your theme, you may need to create a file in your content folder titled _index.md to display content on your homepage. For other themes, the homepage content will be included on in the config file.
10. Create New Content Pages
In Visual Studio Code:
1. Create a New Folder in the content folder within your directory:
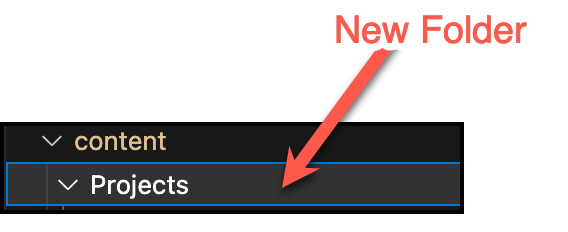
2. Create New File [myFile].md in the new [Projects] folder to create a post.
3. In your new Post, enter the following information at the top:
+++
author = "[Your Name]"
title = "[Post Title]"
date = "[The date of posting]"
description = "[Description of the post]"
+++
4. Below the final +++, enter the content of your post.
You will use Markdown to write all content on Hugo. Writing Markdown is similar to writing a text document, but it requires simple manual formatting. Follow this Markdown guide.
5. Save the new file and close.
View your Hugo site on your browser.
Publishing Your Site Online
1. Push Site to GitHub
Follow these steps to host your site on GitHub Pages.
1. If you don’t already have one - sign up for a GitHub account.
2. For Mac Users:
Create a file in your directory named “.gitignore”
Type
*/.DS_Storein the file content.Save file and close.
3. Create GitHub custom workflow:
Create a file in your directory named “.github/workflows/hugo.yaml”
Copy and paste the YAML provided here, in Step 6 into the new file.
Save file and close.
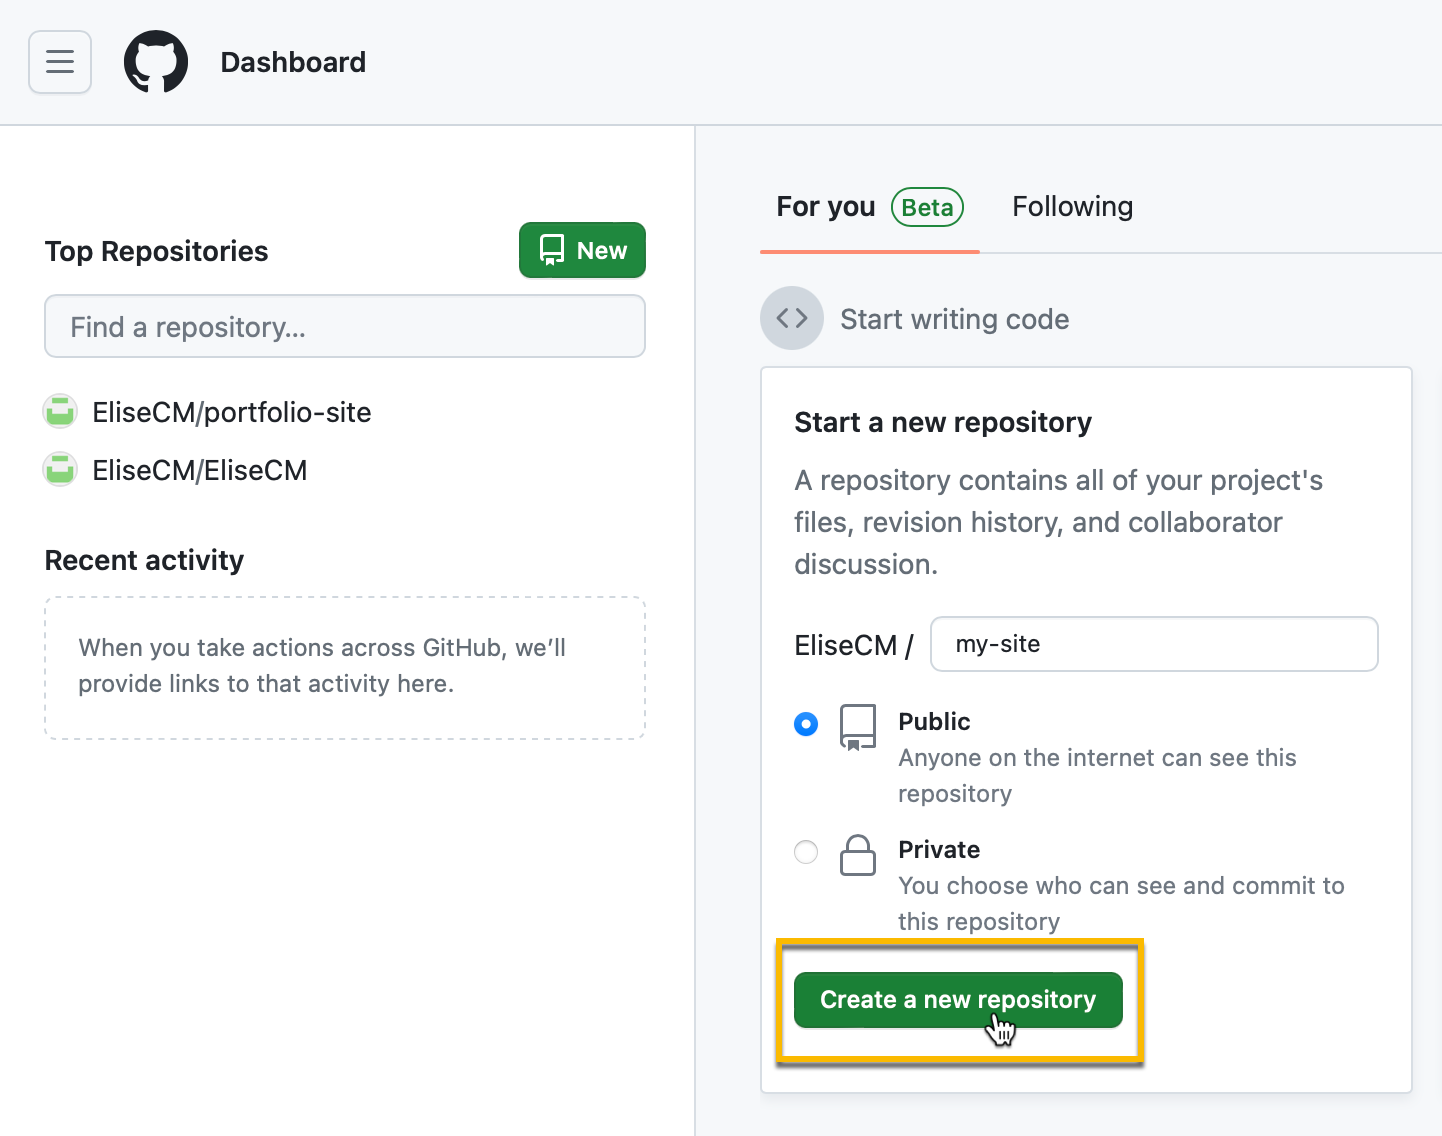
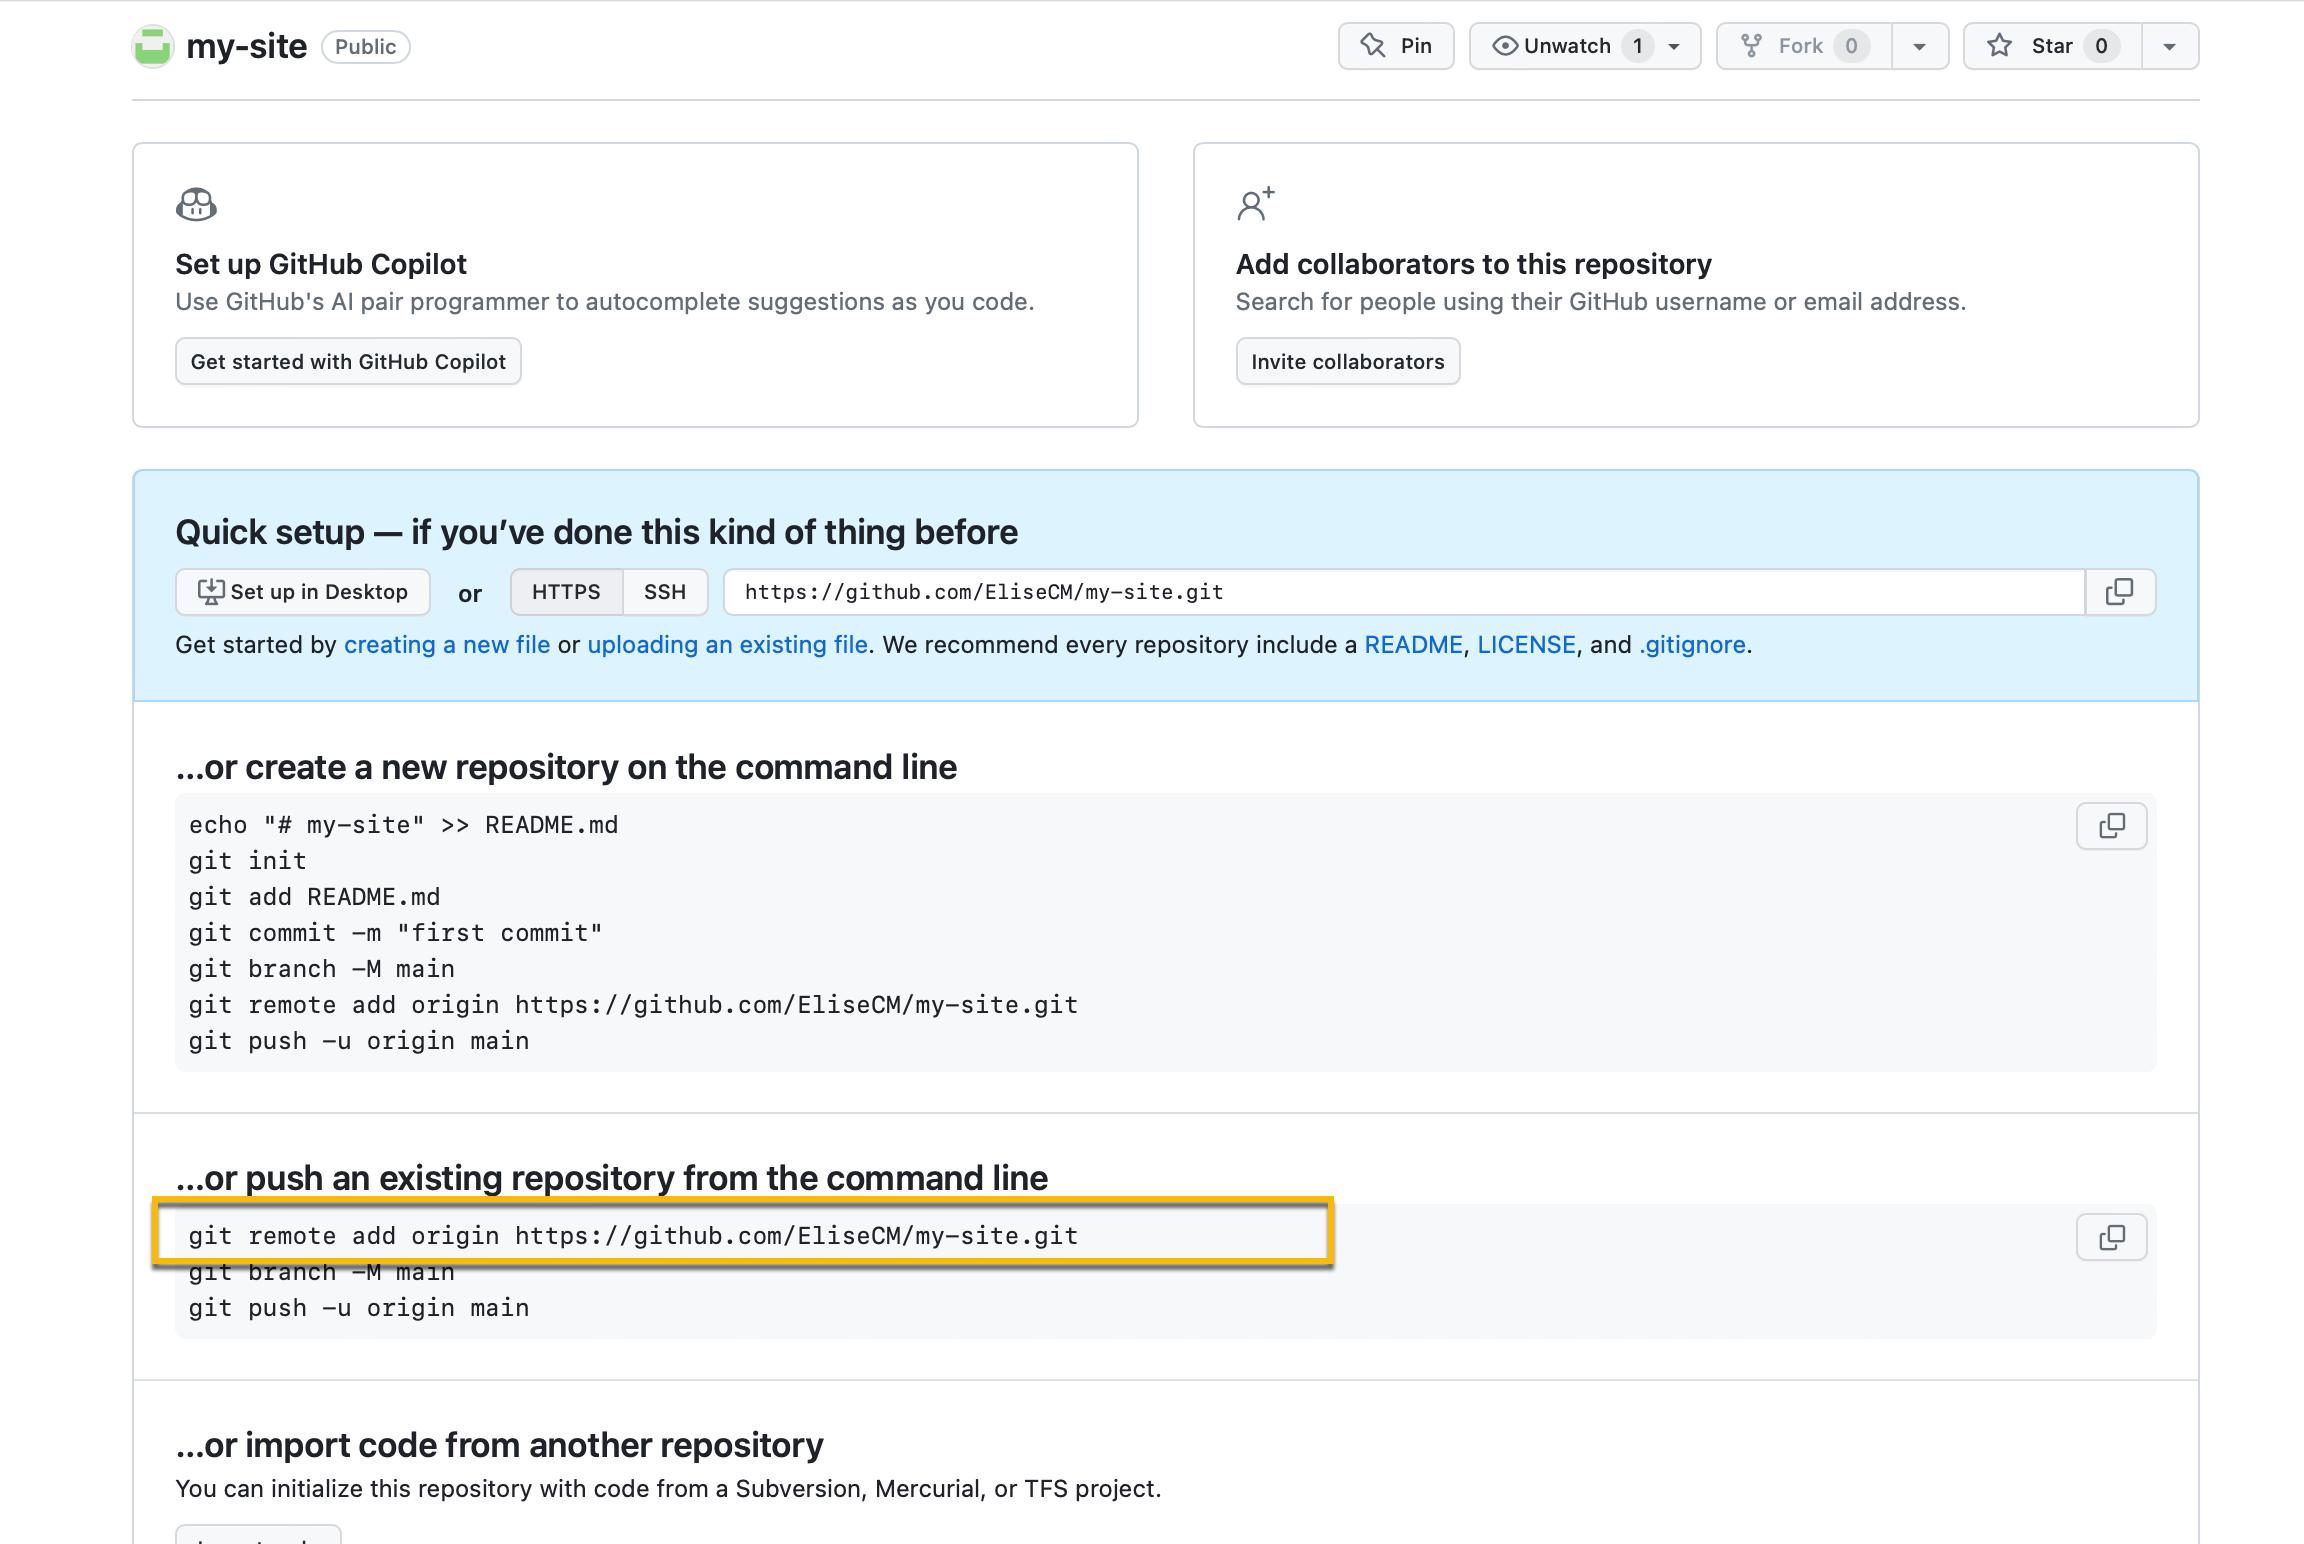
4. Create a New Repository (repo) in GitHub:
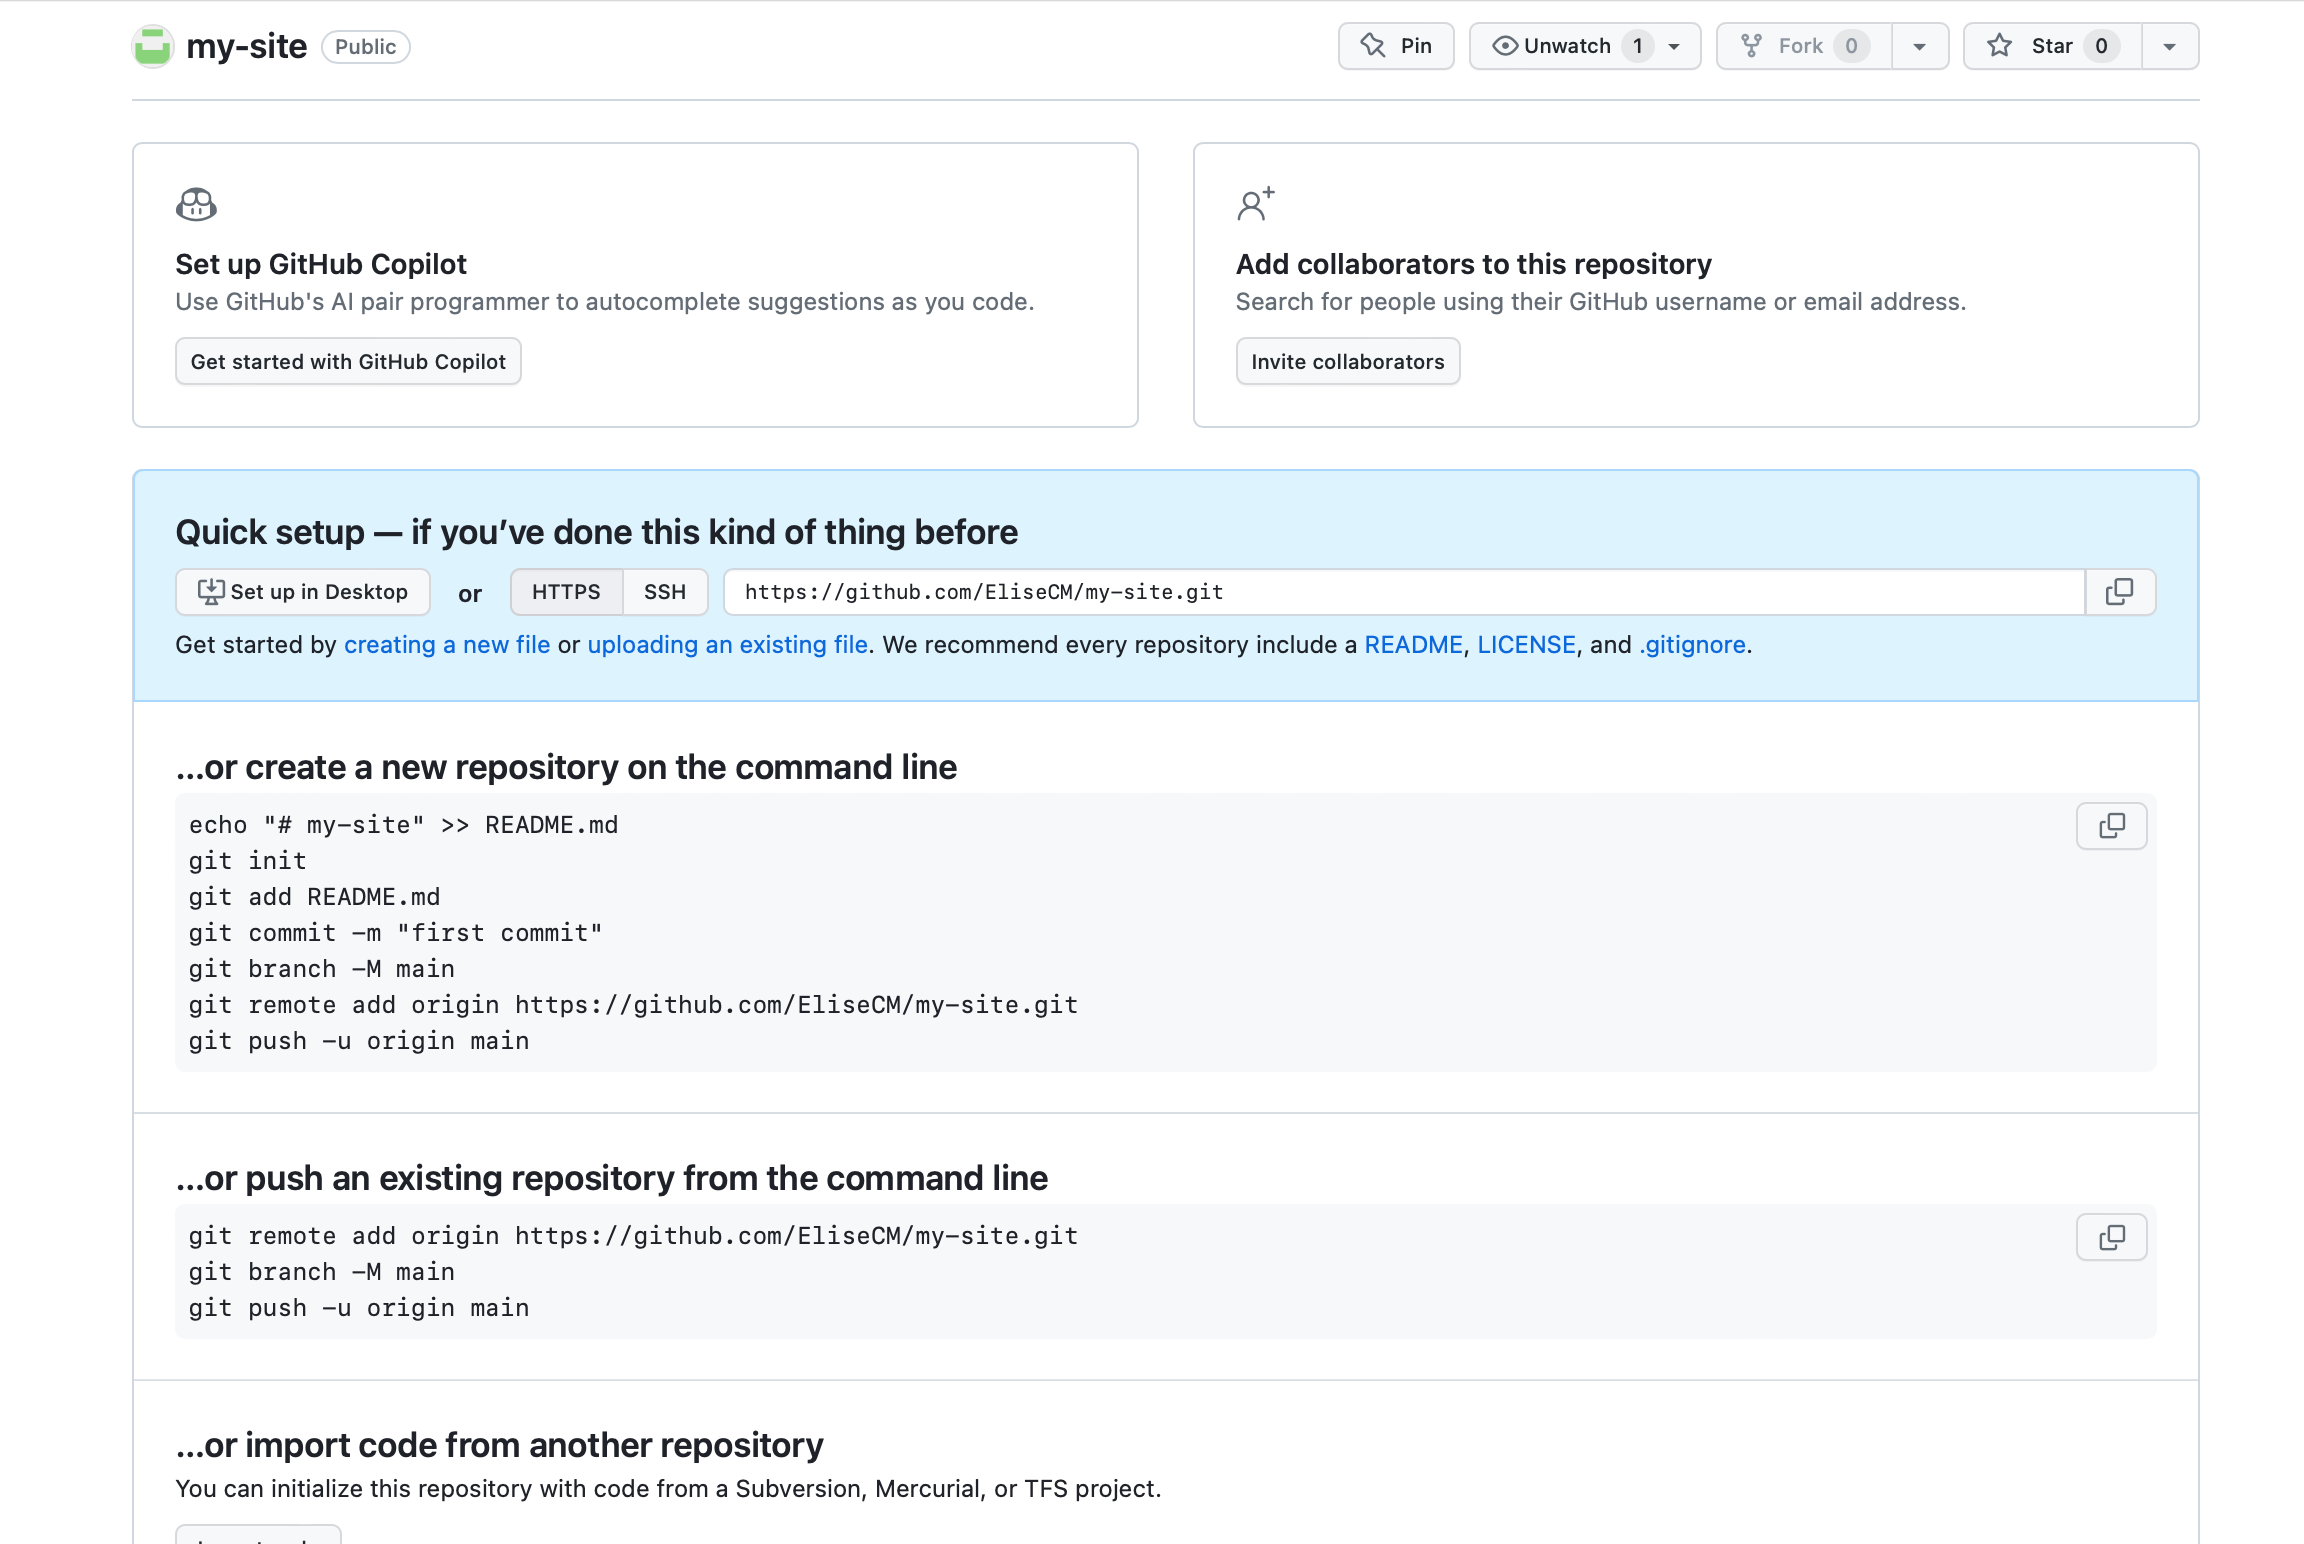
5. GitHub gives you the unique command lines you will need to push your site to GitHub:
6. Navigate to your site directory:
cd [portfolio]
7. Add all files to Git index:
git add -A
8. Commit added files with a message:
git commit -m 'Added all site files'
9. Add your GitHub repo as your new remote origin:
git remote add origin [The Repo URL from GitHub]
10. Tell GitHub to push to your repo’s Main branch:
git branch -M main
11. Push to GitHub:
git push -u origin main
The -u command defines the remote origin (aka your GitHub server) to always be the “upstream” reference. Now, when you push future changes, they automatically go to your site repo.
12. Enter your GitHub username and password when prompted by Terminal:
Two things to be aware of:
- If you have two-factor authentication turned on for your GitHub account, your password will be invalid. See Step 14 below.
- For security, the Terminal will not display what you enter for your password. So, it looks like your typing is not inputting. The password is there but it is hidden. Type or paste your password and press Enter.
13. Create GitHub token to get around two-factor authentication block:
- Go to your GitHub Settings:
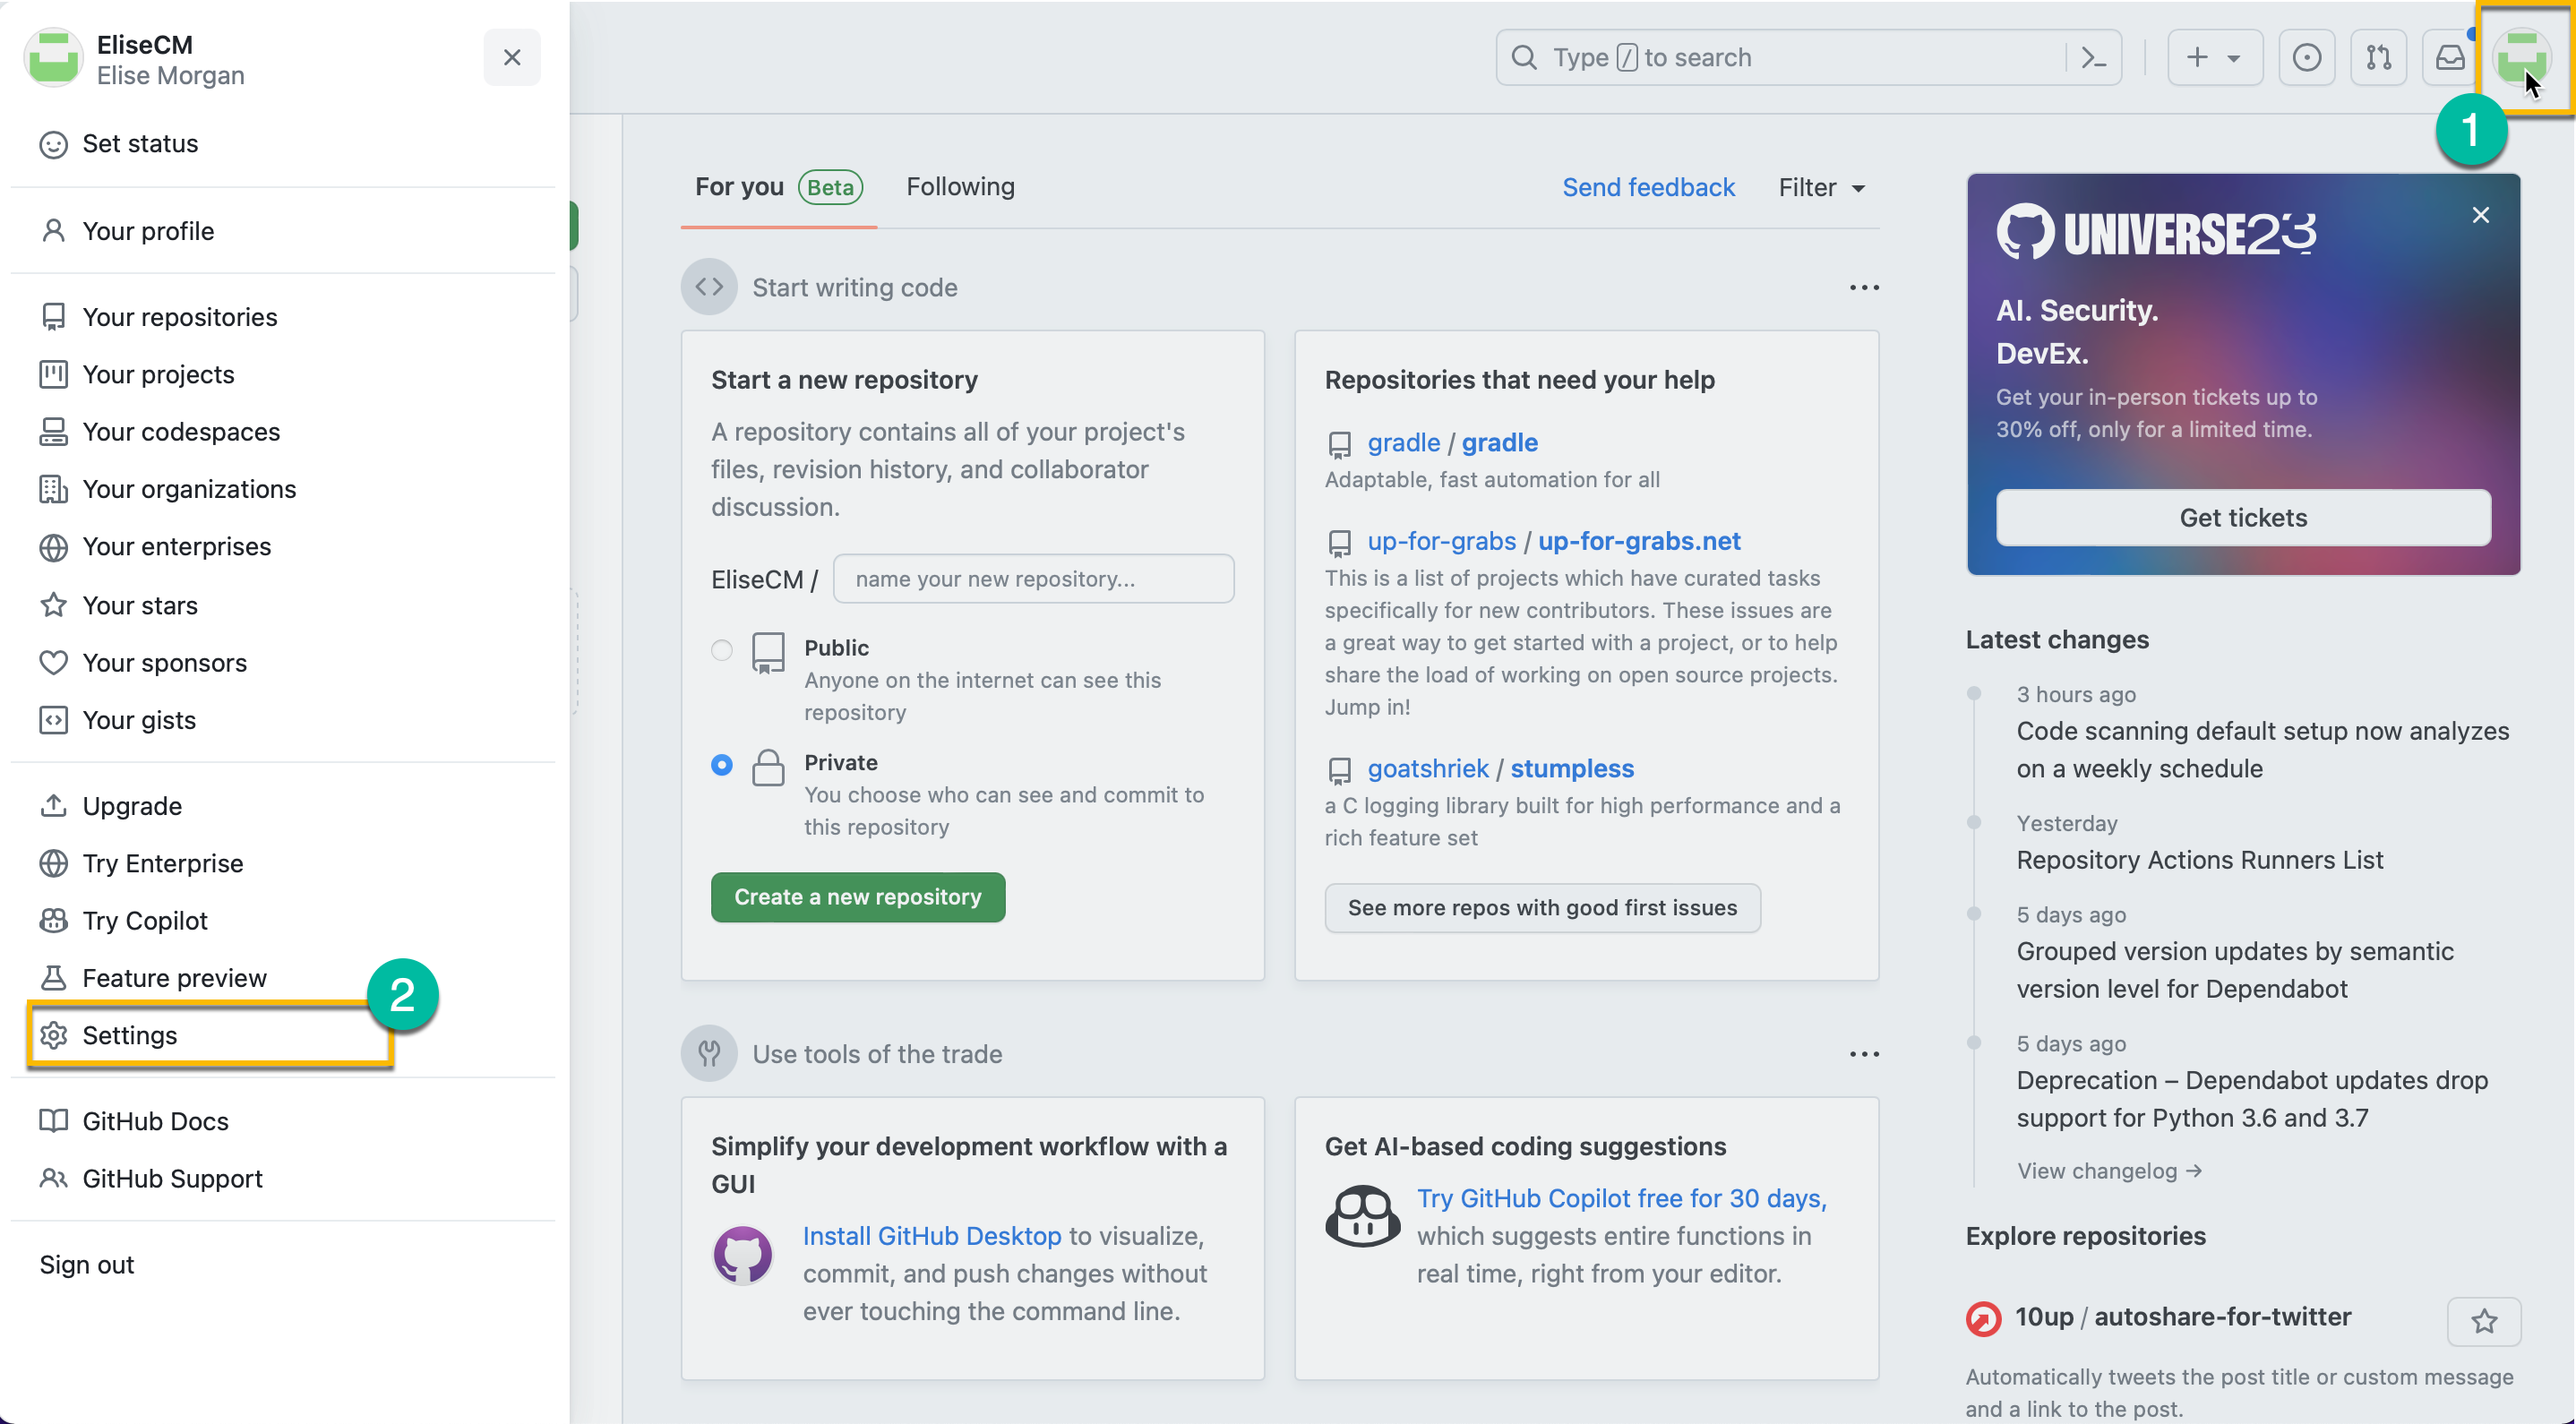
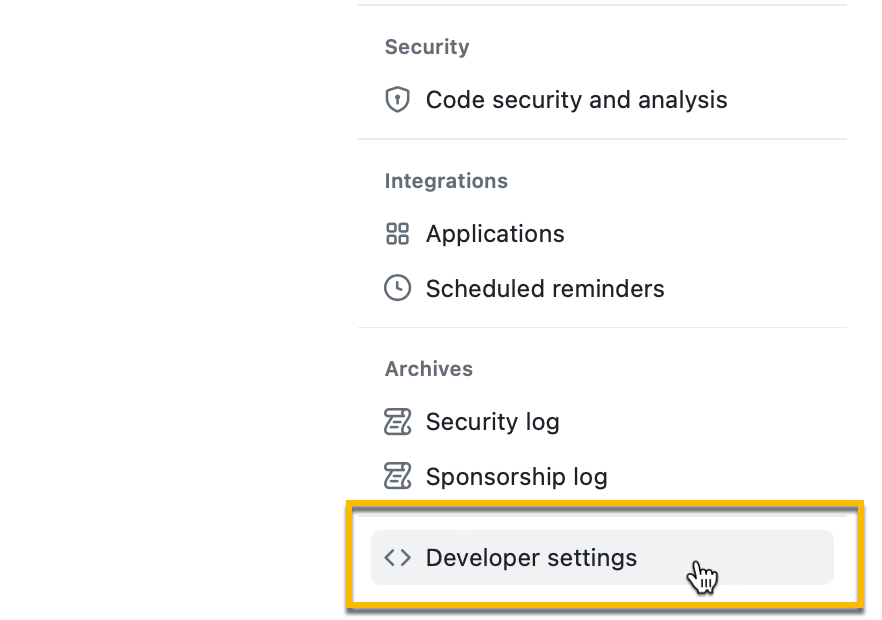
- Click Developer Settings:
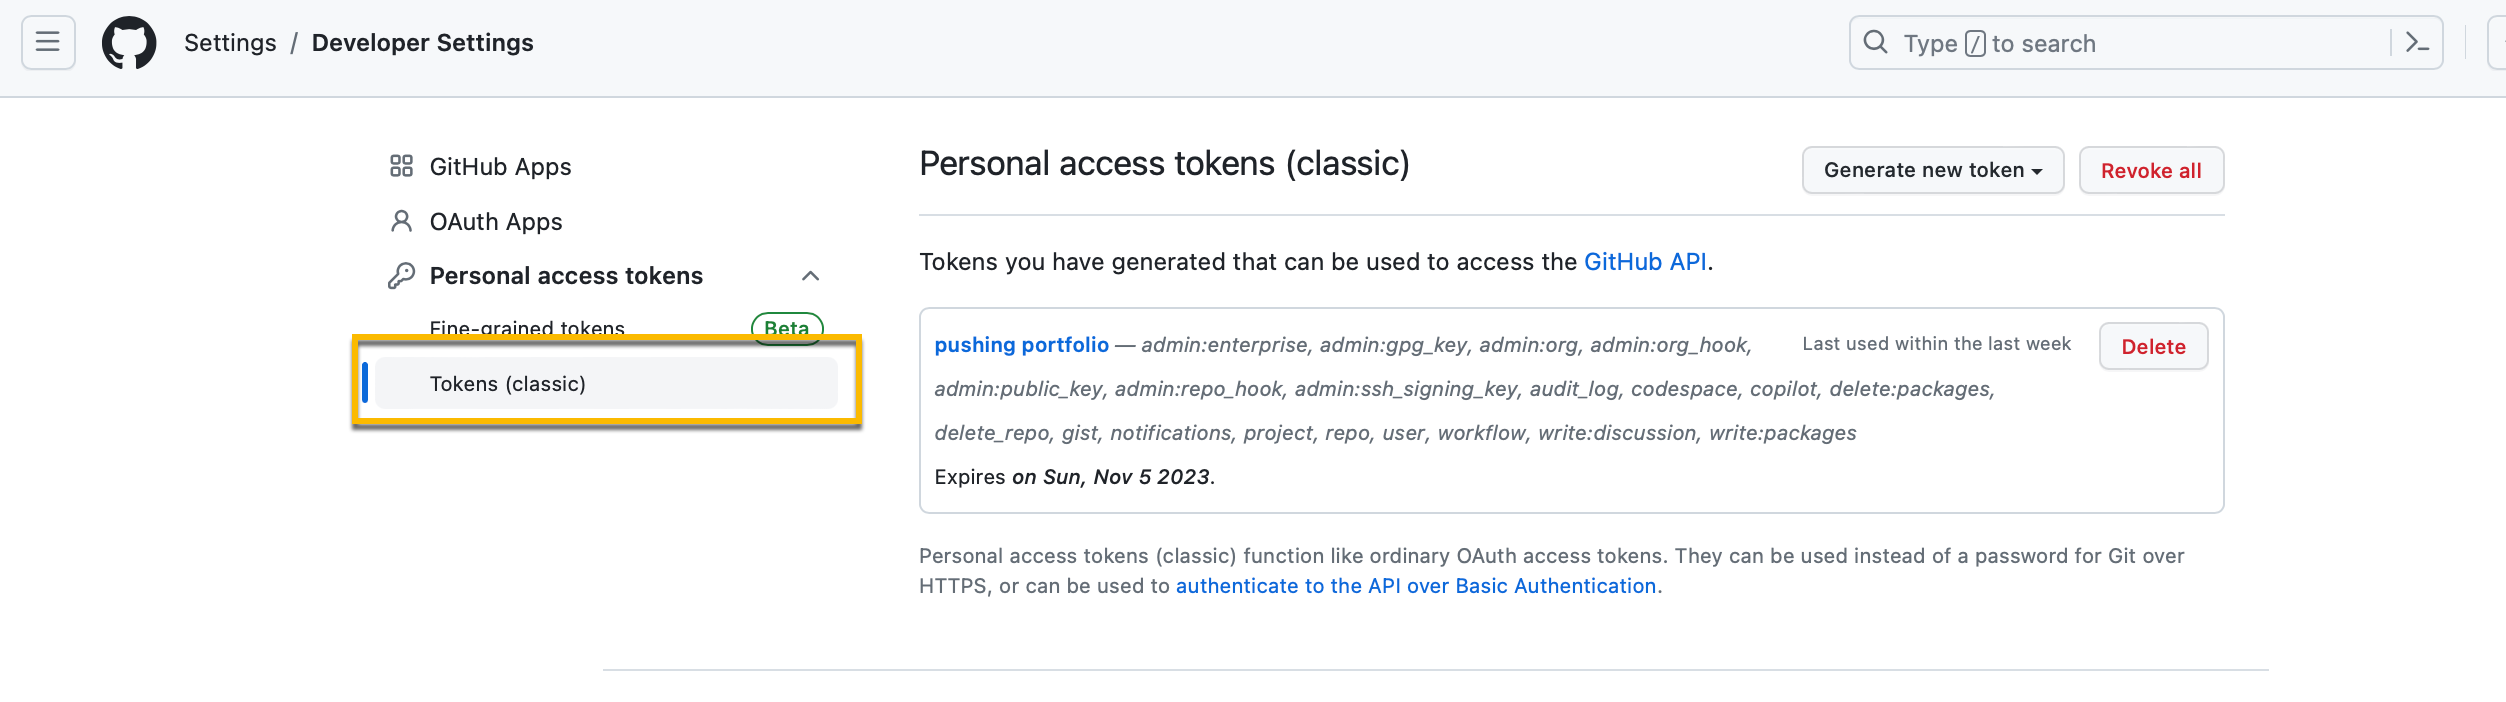
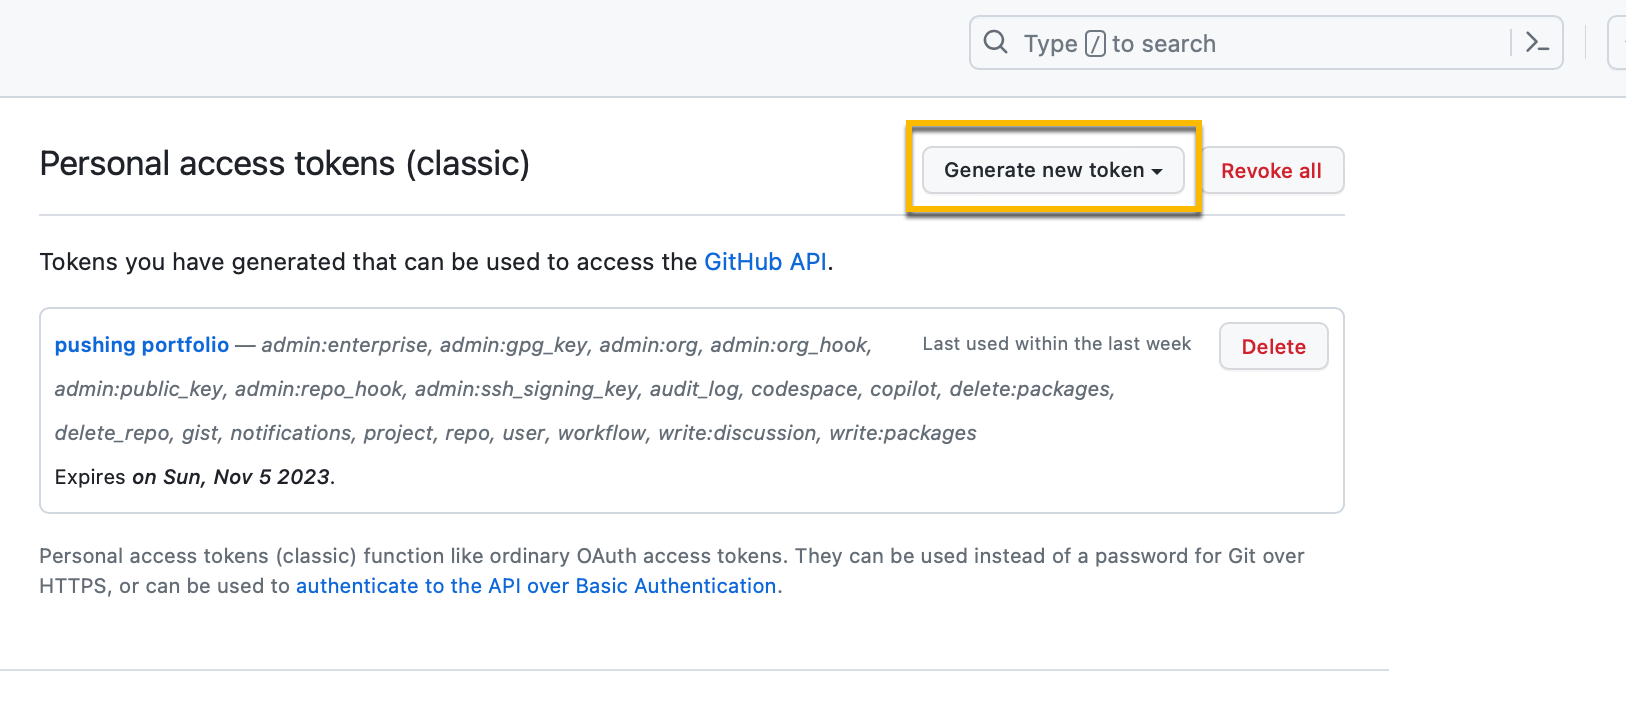
- Click Tokens (classic) in the Personal access tokens drop-down:
- Click Generate new token (classic):
- Immediately paste the token into the “Password” field when prompted by the Terminal.
2. Deploy Site on GitHub Pages
1. Go to your repo on GitHub. It will be populated by all files from your site directory.
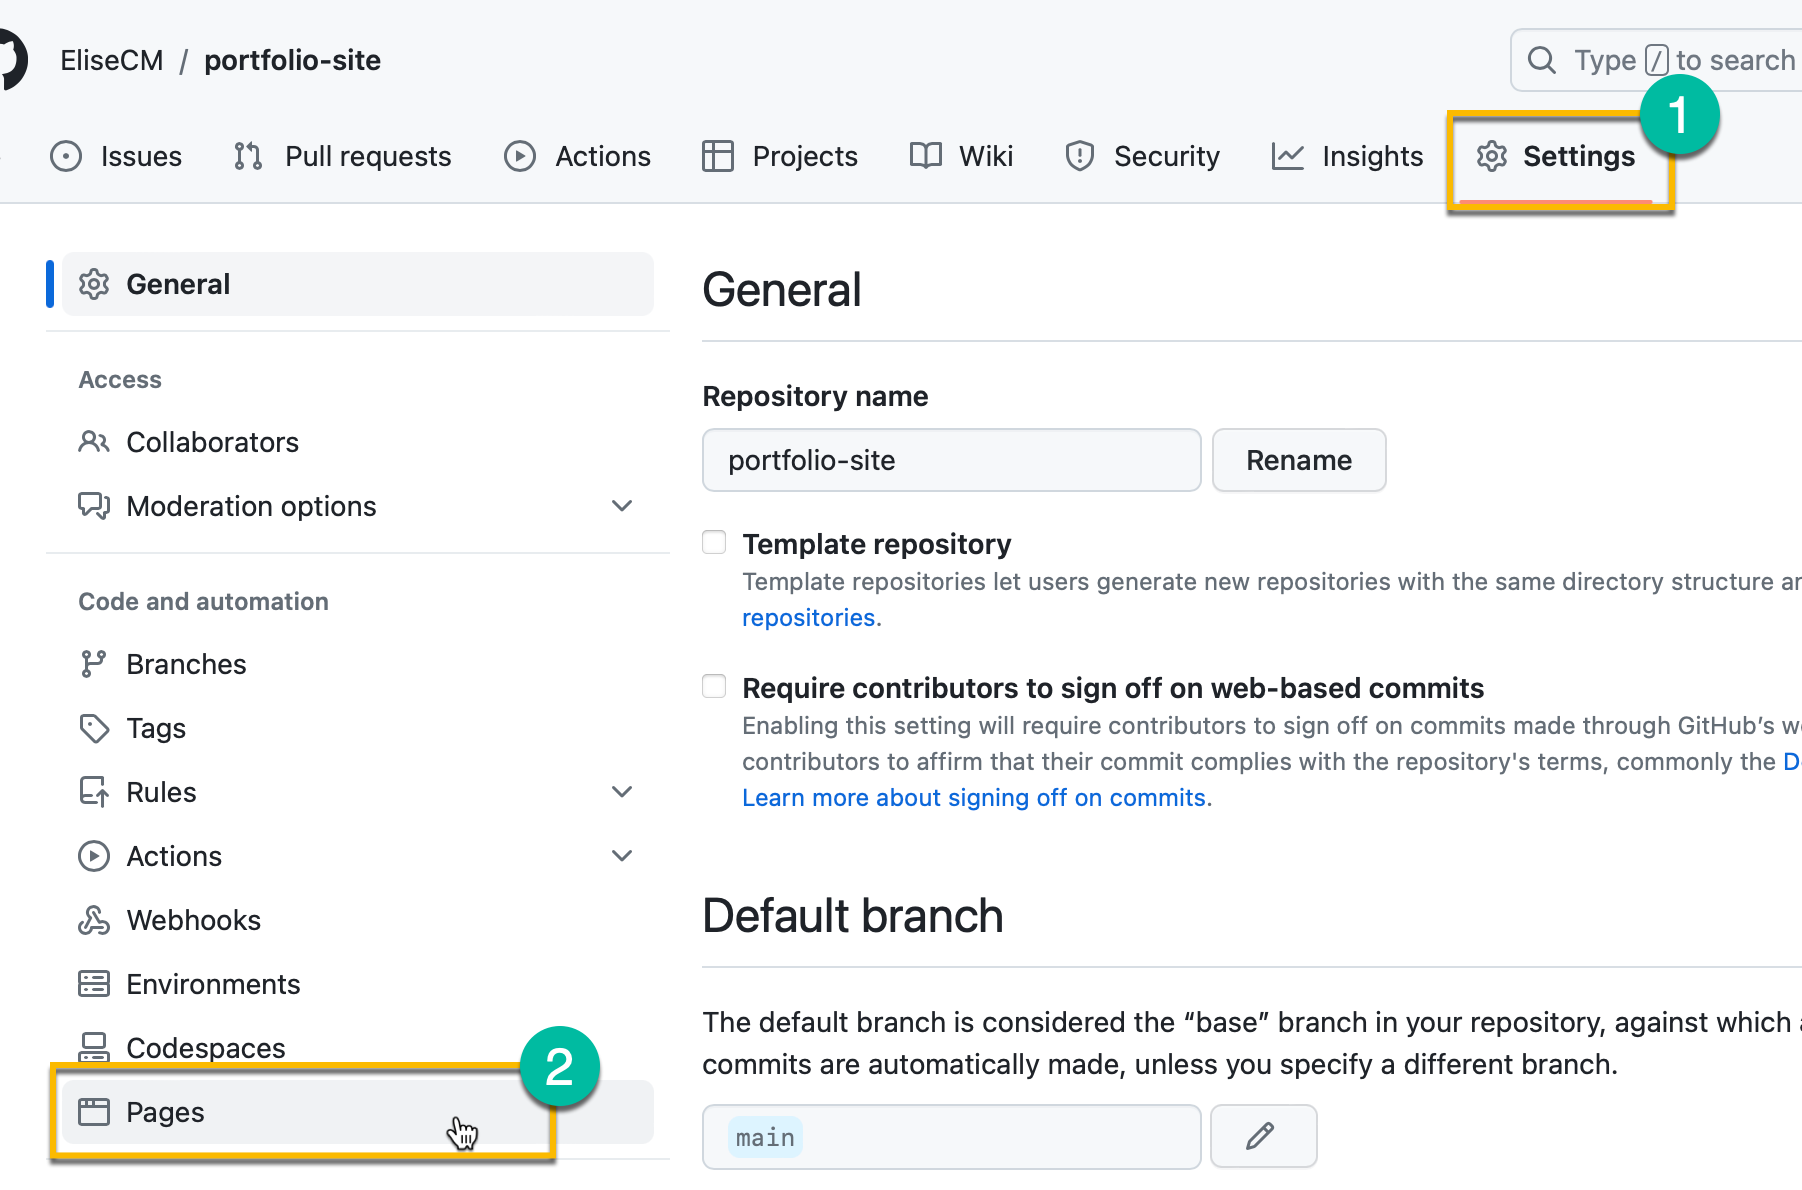
2. In the repo’s menu, click Settings, then click Pages:
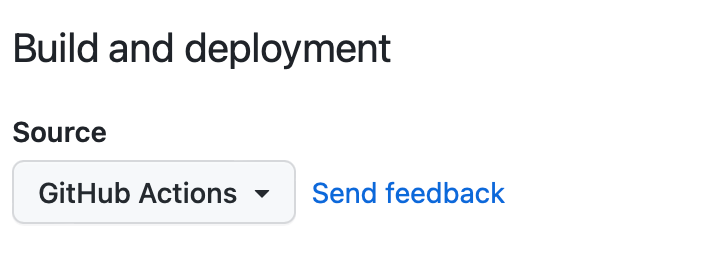
3. Set source to GitHub Actions:
4. In the repo’s menu, click Actions:

You will see an action being deployed, it will likely still be in progress and be yellow. When the deployment is complete, the icon will change to green with a check mark.
5. Go back to your repo’s Settings > Pages. Click your site’s GitHub generated URL to see your site online.
3. Purchase Your Custom URL
1. Read GitHub’s Custom Domain Recommendations.
2. To find out if a URL (domain) is available, type your desired URL into a browser:
If it is available, you will see a message like this:

Do not search this URL again until you have purchased it. Repeatedly searching for the URL will raise the price.
3. Purchase your custom URL. There are many places you can do this. Here is a short list:
I purchased my domain from Pair Domain. Therefore, my instructions for connecting your URL to your site will be shown on Pair Domain.
4. Add SSL Security Certificate to Domain
The SSL ceritifcate will give your URL the https:// in the beginning. If your domain does not have an SSL certificate, visitors will be warned that your site is not secure.
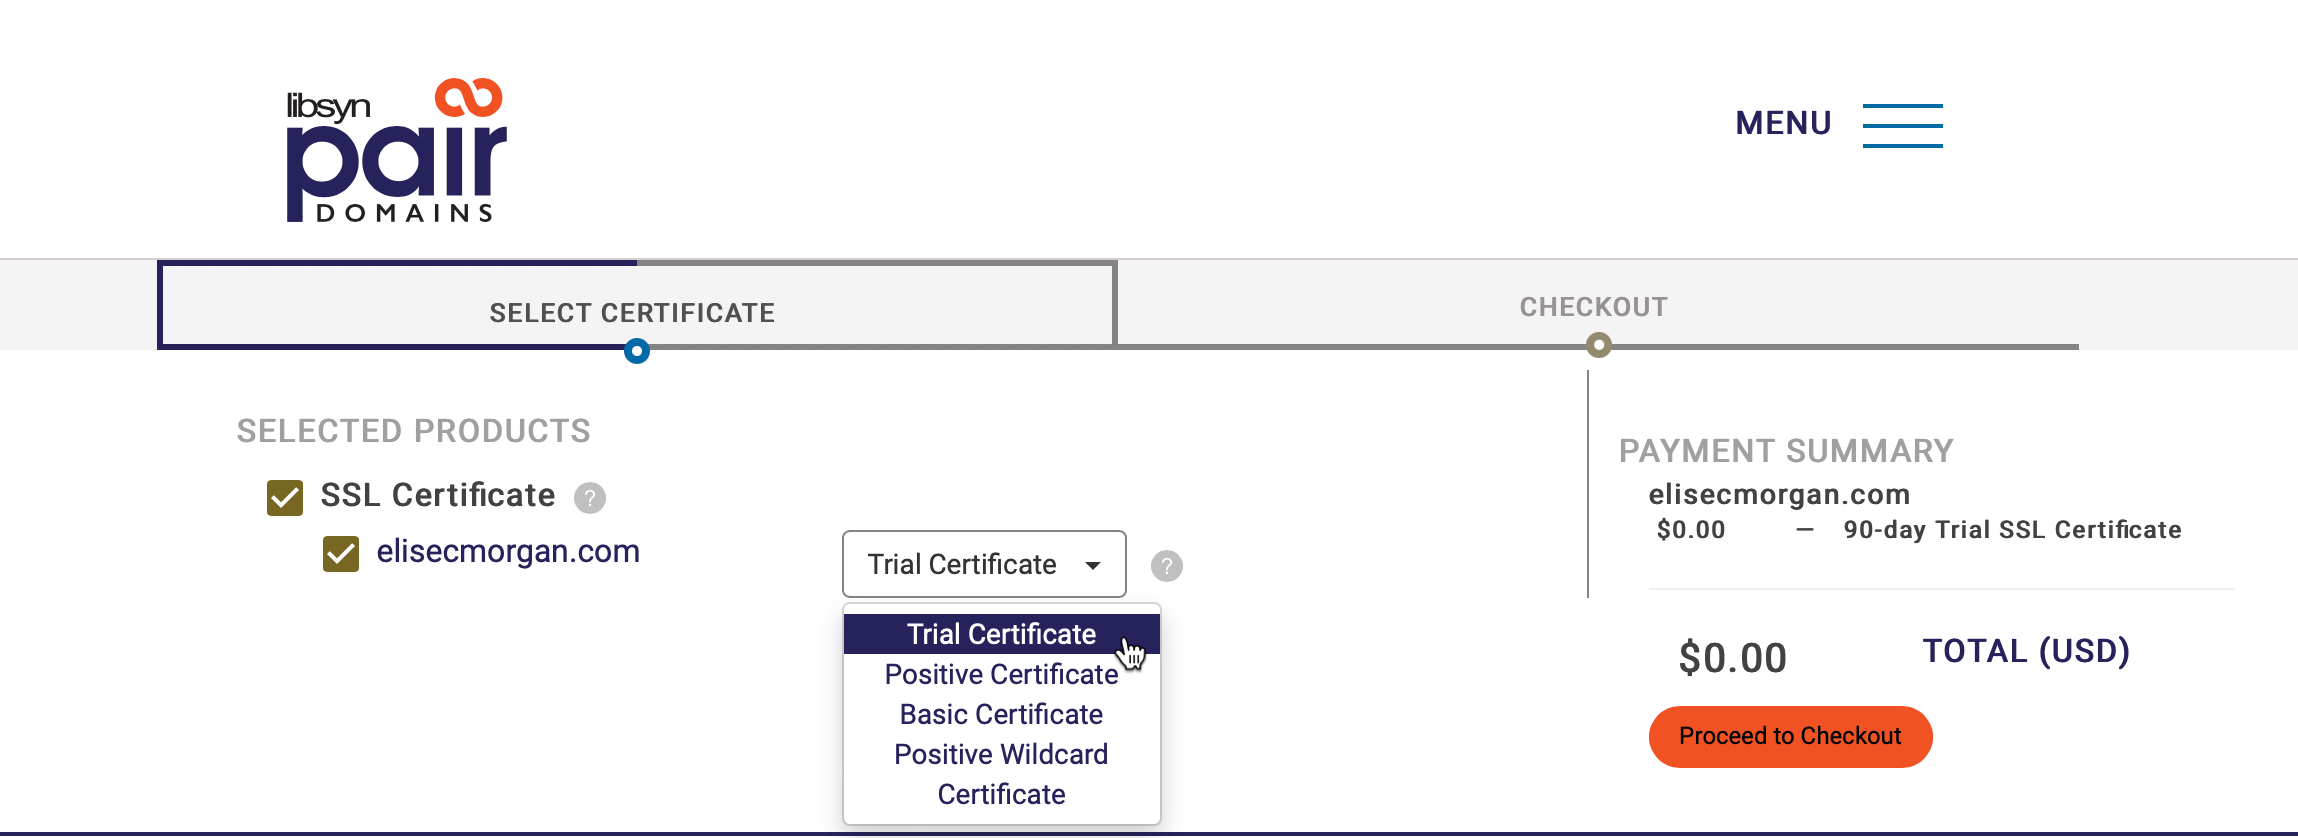
1. Go to your SSL management within your domain manager.
2. Select SSL certitificate and proceed with the domain manager’s instructions:
5. Add Custom DNS Records to Domain
1. Enable Custom DNS Records for your domain.
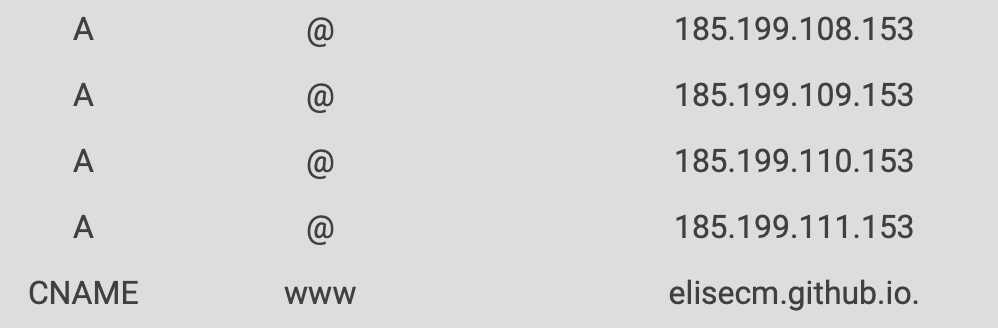
2. Add the following A records exactly:
185.199.108.153185.199.109.153185.199.110.153185.199.111.153
3. Enter your GitHub Page URL in the CNAME destination.
Your DNS records will look like this:
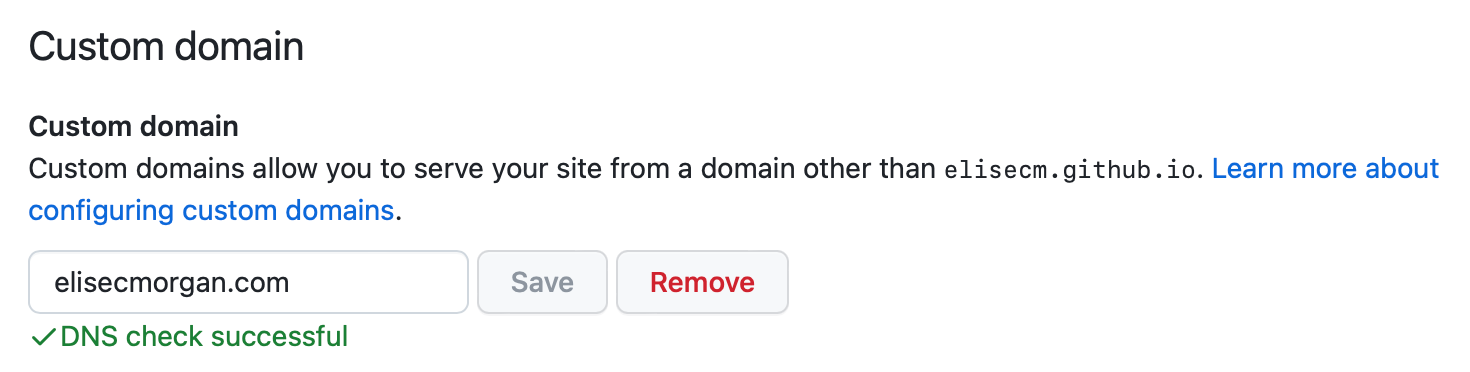
6. Enter your custom domain on GitHub Pages
Enter your custom domain in your GitHub Page settings: